Friday, August 22, 2025

Friday Face Off: Smiling Couple

  
Friday Face Off is a feature by DVArtist, Art, Food, Gardening to show off faces, no matter the medium, no matter if it's human, alien, animal, monster, or anything else. It can be something you captured, created, or found.

For my Friday Face Off I decided to show off my photography every week. I'll post one of my favorite photos of a face every week and just show off that one photo.

Wednesday, August 20, 2025

Photography Prompt: Elderly

 
Welcome to my weekly photography prompt meme! Each week, I’ll share a fun new prompt and post my own photos to go with it. Then it’s your turn—snap some pics, share your take, and tag the meme so we can all enjoy each other’s creativity! Let’s make something beautiful together!

This weeks prompt is... Elderly!
This is one of my all time favorite photos I've EVER taken. It means a lot to me, I love the emotions, the love, the details of it. 


Friday, August 15, 2025

Friday Face Off: Mommy Love

  
Friday Face Off is a feature by DVArtist, Art, Food, Gardening to show off faces, no matter the medium, no matter if it's human, alien, animal, monster, or anything else. It can be something you captured, created, or found.

For my Friday Face Off I decided to show off my photography every week. I'll post one of my favorite photos of a face every week and just show off that one photo.


Thursday, August 14, 2025

ASL Mini-Pack #2: Dolphin, Whale, Jellyfish, Octopus, Sea Turtle


Today we're going to be learning how to sign dolphin, whale, jellyfish, octopus, and turtle!

Learning animal signs in American Sign Language (ASL) is a fun, visual way to build vocabulary. This mini-pack focuses on five popular ocean animals: Dolphin, Whale, Jellyfish, Octopus, and Turtle. Each sign uses clear handshapes and motions that resemble the animals themselves, making them easy to remember.

Dolphin

Handshape: Start with your dominant hand in the “D” handshape (index finger up, middle-ring-pinky touching the thumb).

Location: Hold the hand palm-down near the side of your other hand (which acts as “water”).

Movement: Make a small arching jump motion (like a dolphin leaping out of water) across your non-dominant flat hand.

Tip: Think of your “D” hand as the dolphin cresting a wave.


Whale

Handshape: Use one flat hand to represent “water” and your other hand in the shape of a tail (thumb and pinky extended, other fingers closed).

Placement: Hold the flat “water” hand horizontally in front of you. Position the “tail” hand above or behind it.

Movement: Sweep the “tail” hand upward in a gentle arc, as if a whale’s tail is rising out of the water.


Jellyfish

Handshape: Start with your dominant hand’s fingers spread out (like a 5-hand).

Movement: Make a wavy, dangling motion downward to represent the tentacles of a jellyfish.

Non-Dominant Hand: Some versions use the non-dominant hand in a flat “C” shape above, representing the jellyfish dome, while the dominant hand wiggles down below.

Tip: The key is the flowing, floating movement of the tentacles.


Octopus

Handshape: Place your dominant hand in a flat “O” shape on top of your non-dominant hand, which is open and palm down.

Movement: Wiggle the fingers of the non-dominant hand, representing the octopus’ tentacles under its head.

Alternative: Some signers use both hands as tentacles, but the flat “O” head with wiggly “tentacles” underneath is common.


Sea turtle

Handshape: Form both hands into loose fists, thumbs extended (like an “A” hand with thumb out).

Placement: Place your non-dominant fist in front of you, palm facing down. Position your dominant fist on top of it, thumbs crossing.

Movement: Wiggle both thumbs to mimic a turtle’s flippers moving, while keeping the hands stacked to suggest the turtle’s shell.

Variation: Some signers first sign “SEA” (wave-like motion with a flat hand) before making the turtle sign for clarity, especially in teaching or storytelling.


Why Use Animal Signs?

Memory Boost: Animal signs are highly iconic, making them easy to remember.

Visual Learning: Perfect for kids, homeschoolers, and co-op groups.

Communication Skills: Expand vocabulary for both ASL beginners and kids who benefit from sign-supported learning.


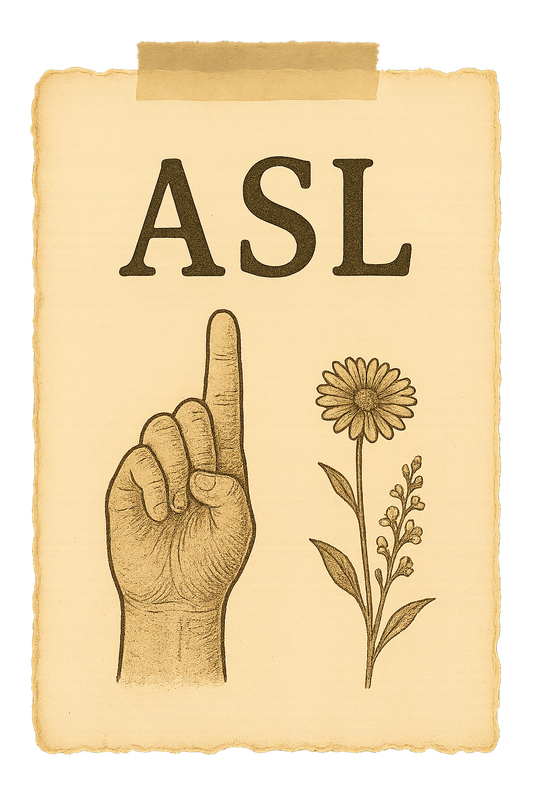
ASL vintage title art Ocean title art

STEM: Seaweed Snack Taste Test — Let the Kids Rate It


Seaweed Snack Taste Test — Let the Kids Rate It

Seaweed snacks are a love-it-or-hate-it food, but they’re packed with nutrients and offer a fun way to introduce kids to ocean flavors! We decided to turn it into a family taste test challenge — complete with a rating system and some honest kid feedback (because kids don’t sugar-coat it!).

Why Seaweed?

Seaweed is full of vitamins, minerals, and natural umami flavor. It’s a staple in many cultures and comes in all sorts of flavors these days. Doing a taste test not only makes trying something new exciting but also helps kids explore their taste buds and talk about flavors.

Seaweed Flavors to Try

Here are some fun store-bought seaweed snack flavors you can easily find:

Classic Sea Salt – The original, simple flavor.

Wasabi – Spicy and bold (test this with older kids who like heat).

Teriyaki – Sweet and savory, often a kid favorite.

Sesame – Nutty and rich.

Sriracha or Spicy Chili – For adventurous palates.

BBQ or Smoked – A unique twist that tastes less like the ocean.

Sea Salt & Vinegar – Tangy and salty, like ocean chips.

Olive Oil or Avocado Oil – Light, crisp, and mild.

Coconut or Sweet Seaweed Chips – Sweet-savory fusion (great for younger kids).

Cheese Flavored Seaweed Chips – A quirky but fun option.

How to Set Up Your Taste Test

Gather the Snacks – Buy 5–8 different flavors. Cut sheets into bite-sized pieces.

Create a Rating Card – Use a printable sheet with categories like:

Yummy Level (1–5 stars)

Texture (Crispy? Chewy?)

Aftertaste (Good, Bad, or Weird?)

Would you eat it again? (Yes/No)

Blind Test – Label samples with letters (A, B, C…) so kids try them without knowing the flavor.

Discuss and Vote – Let each child share their thoughts and crown a “winner.”
Fun Additions

Pair the snacks with sticky rice balls to show how seaweed is used in sushi.

Create a "Seaweed Snack Board" with fruits, crackers, and cheese for a taste-test platter.

Take photos of the kids’ reactions for your blog or scrapbook.


Image 1 Image 2

Wednesday, August 13, 2025

Ocean: Shark porthole suncatchers

v

Shark & Ocean-Themed Porthole Crafts – 5 Ways

These ocean crafts all create a “window into the sea” effect, with sharks and ocean animals swimming by. Choose one version or mix and match depending on the supplies you have. Each is simple, budget-friendly, and makes a great sunny window decoration.

1. Amazon Shark Porthole Kit


Best for: quick, ready-to-use activity with minimal prep

Supplies:
Shark/ocean animal porthole craft kit (includes frames, silhouettes, tissue paper, and string)
Scissors (if kit requires trimming)
Optional: extra tissue paper for more color variety

2. Paper Plate Porthole


Best for: inexpensive, kid-friendly version with a sturdy base

Supplies:
Sturdy white paper plate
Silver or gray paint (or metallic marker)
Paintbrush or sponge
Clear contact paper (sticky on one side)
Tissue paper in blue, teal, white, and gray
Shark silhouette (printed or hand-drawn on black paper)
Scissors
Hole punch & string or ribbon for hanging
Optional: aluminum foil dots or gems for “bolts”

3. Shark Silhouette Suncatcher (Not a Porthole)


Best for: a bold shark outline with stained-glass effect

Supplies:
Black cardstock or construction paper
Printed shark outline template
Clear contact paper
Tissue paper in shades of blue & teal
Scissors/craft knife (to cut out inside sections)
Tape or glue stick
Hole punch & string or suction cup for hanging

4. Faux Sea Glass Ocean Porthole


Best for: a textured, realistic sea glass look

Supplies:
Clear plastic lids (from takeout containers or jars)
Faux sea glass pieces (plastic or craft glass — avoid sharp edges)
Strong clear glue (craft glue, tacky glue, or hot glue for older kids)
Shark or fish silhouettes (optional, cut from waterproof vinyl or paper and glued underneath)
String or suction cup hook for hanging

5. All-Paper Porthole


Best for: classrooms or group crafts without messy materials

Supplies:
Black construction paper or cardstock (for frame)
Shark silhouette (cut from gray, black, or printed template)
Tissue paper in blue, teal, white
Glue stick or double-sided tape
Scissors
Optional: silver cardstock or metallic marker for “bolts”


Basic Instructions for All Versions

Create Your Frame or Shape
Cut out a porthole ring, paper plate center, or shark shape.
Prepare the Background
Add tissue paper pieces to contact paper, overlapping colors.
Add the Shark/Animals
Glue or press silhouettes onto the background.
Seal (if using contact paper)
Add a second contact paper layer to sandwich the design.
Hang in a Window
Use string, ribbon, or suction cups to display.

Tips & Variations
Add fish, seaweed, or bubbles for extra detail.
Use gold or silver cardstock for a metallic porthole look.
Layer different shades of blue for more depth.
Mix styles — you can create a porthole with a shark silhouette, or a sea glass piece with animal shapes inside.

STEM Tie-In
When sunlight passes through tissue paper or sea glass, certain colors of light are absorbed while others pass through, creating the “stained glass” look. This is similar to how water filters sunlight — reds disappear first underwater, leaving blues and greens at greater depths.


🦈 Shark Facts to Share While Crafting
Sharks don’t have bones!
Their skeletons are made of cartilage — the same flexible stuff in your ears and nose.

They’ve been around longer than trees.
Sharks have existed for over 400 million years, way before the first trees appeared.

Some sharks glow in the dark.
Certain deep-sea sharks have bioluminescence, which helps them camouflage or communicate.

Sharks lose teeth constantly.
Some species can go through 30,000 teeth in a lifetime — they just keep growing new ones.

Not all sharks are big hunters.
The whale shark is the largest fish in the sea but eats tiny plankton.

Sharks have amazing senses.
They can detect a drop of blood in the water from up to a third of a mile away.

They’re vital to the ocean’s health.
Sharks keep fish populations balanced and help coral reefs thrive.

📚 Read-Aloud & Storytime Suggestions

You can either read a picture book, a chapter from a nonfiction book, or a short article while kids work.

Picture Books (Younger Kids)

Shark Lady by Jess Keating — about Eugenie Clark, a pioneering female shark scientist.
If Sharks Disappeared by Lily Williams — simple but powerful on why sharks matter.
I Am the Shark by Joan Holub — fun and fact-filled, comparing different shark species.

Nonfiction (All Ages)

National Geographic Kids: Sharks! by Anne Schreiber — great mix of photos and facts.
The Ultimate Book of Sharks by Brian Skerry — stunning images and detailed info.

Short Articles or Passages

A kid-friendly shark conservation article from the Monterey Bay Aquarium or WWF.
Fun “Top 10 Weirdest Sharks” lists to keep them giggling while they glue.

Pro Tip:
If the group is restless, read one fact or short paragraph every few minutes so it feels like a fun “fact break” instead of a long lecture.

Ocean graphic

Photography Prompt: Broken

  
Welcome to my weekly photography prompt meme! Each week, I’ll share a fun new prompt and post my own photos to go with it. Then it’s your turn—snap some pics, share your take, and tag the meme so we can all enjoy each other’s creativity! Let’s make something beautiful together!

This weeks prompt is... Broken! It can be anything! Torn paper, broken dishes, broken glass, something torn about, abandoned! Anything.

This was another hard one for me, because I had a few that would fit, but I immediately thought of this shoot I did at an abandoned house, the model was a broken doll!


Tuesday, August 12, 2025

Parenting: Beach tantrums and ADHD


The Messy Mama Brain Dump is a feature where I talk about anything and everything related to parenting, being a mom, and kids.

Parenting at the Beach with ADHD Kids: Packing Systems & Meltdown Plans

A day at the beach can feel like a sensory overload — the noise of the waves, the sand, the sun, and the crowds. For kids with ADHD, this can be both exciting and overwhelming. The key to a successful trip is preparation, structure, and having a calm plan when things don’t go smoothly.

1. Packing Systems That Work

Color-Coded Bags

Assign each child a bag in a different color — one for toys, one for snacks, one for clothes. This makes it easy to find what you need fast without digging through one big bag.


The Essentials Checklist

Comfort Items: Weighted blanket or fidget toys for downtime.


Sensory-Friendly Clothes: Soft, tag-free swimsuits or rash guards. 
I found this website for adaptive clothing

Noise Management: Earplugs or noise-reducing headphones (especially if waves and crowds are overwhelming).

Visual Aids: A small visual schedule card (e.g., pictures of “swim,” “snack,” “break,” “pack up”) to keep transitions smooth.
Example:


Extras: Sunscreen (spray or roll-on for sensory-sensitive kids), water shoes, and pre-portioned snacks in easy-open containers.


2. Set Up a “Base Camp”

Choose a spot near a landmark (lifeguard stand or rock formation) to avoid wandering confusion.

Lay down a large blanket or tarp to define your “safe zone.”

Keep an umbrella or pop-up tent for shade and quiet breaks.


3. Pre-Plan Sensory Breaks

Have calm downtime every 30–60 minutes (under an umbrella or in a shaded tent) to prevent sensory overload.

Rotate activities — digging in the sand, collecting shells, wading — to keep interest without overstimulation.

4. Meltdown Management Plan

Stay Calm: Your calm energy helps regulate theirs.

Create a Safe Space: Bring a weighted lap pad, a small chair, or even the car for a quiet reset if needed.


Identify Triggers Early: Look for signs of rising frustration — covering ears, pacing, refusing to play — and offer a break before the meltdown hits.

Use “First/Then” Language: (“First we have a snack, then we go back to the water.”) This helps with transitions.

5. Keep Hydration & Food Front and Center

Low blood sugar or dehydration can make ADHD symptoms worse. Keep cold water and high-protein snacks ready to avoid mood dips.

Here is a list of beachy snacks:

Fruits (pre-cut & packed in leakproof containers)
Watermelon cubes
Pineapple chunks
Grapes (freeze overnight for extra chill)
Apple slices (toss in lemon juice to prevent browning)
Berries mix (strawberries, blueberries, raspberries)

Veggies & Dips
Baby carrots with hummus cups
Cucumber slices with ranch dip
Bell pepper strips
Snap peas with tzatziki

Protein Snacks
Turkey & cheese roll-ups (wrapped in lettuce or tortillas)
Hard-boiled eggs (pre-peeled for easy eating)
Beef jerky or turkey jerky
Edamame pods (salted)

Crunchy Snacks
Pretzels
Whole-grain crackers
Popcorn (lightly salted)
Rice cakes with nut butter

Sweet Treats (heat-friendly)
Trail mix (nuts, seeds, dried fruit, M&Ms or yogurt chips)
Granola bars (oat-based, not chocolate-heavy)
Dried mango or banana chips

🥤 Drinks

Hydration Essentials
Water bottles (freeze half full, then top off before leaving)
Electrolyte packets (Liquid I.V., Gatorade powder)
Infused water bottles (lemon, cucumber, mint)

Kid-Friendly
Juice boxes (100% juice, no added sugar if possible)
Capri Suns or Honest Kids pouches (freeze them for slushy drinks later)

For Adults
Sparkling water cans (LaCroix, Bubly, etc.)
Iced tea in reusable bottles
Cold brew coffee in an insulated tumbler

6. End-of-Day Transition

Give a 10-minute warning before leaving and show a visual countdown (e.g., timer on your phone). Let them help pack something simple so they feel involved rather than surprised.


7. Parenting Tip: Lower Expectations
The beach is supposed to be fun. If you need to leave early or adjust plans, it’s not failure — it’s just good parenting to listen to your child’s needs.


Image 1
Image 2

Photography: Creative Motion Blur with Waves (Kids Can Do It Too)


Photography Fun: Creative Motion Blur with Waves

(For Kids, Families, and Photographers of All Levels)

Waves never sit still — and that makes them perfect for a little photography magic. Motion blur captures that constant movement so your photos look dreamy, streaky, and full of life. Whether you’re a kid with a phone, a parent snapping vacation memories, or a photographer looking to try a new technique, motion blur can spark your creativity.

Best part? You don’t need fancy gear. A phone, tablet, or basic camera will do just fine — though if you do have professional equipment, you can take this technique to the next level.

Why Motion Blur is Awesome

For Kids: It’s hands-on, easy to see results, and makes “mistakes” look like art.
For Hobbyists: A playful way to experiment with shutter speed and composition.
For Pros: A chance to create intentional, fine-art images that stand out in a portfolio.

What You’ll Need

A camera, phone, or tablet with manual/“Pro” mode (to control shutter speed)
Tripod or steady surface (optional but highly recommended)
A spot with moving water — ocean waves, waterfalls, fountains, or even a stream
Optional for pros/hobbyists: ND filter to slow shutter in bright light, remote shutter release, and RAW shooting for more editing flexibility

How to Do It

1. Start with Safety
If you’re by the ocean, keep a safe distance from breaking waves.
Use a strap or wrist tether for phones/cameras — no one wants a sea-soaked device.

2. Find Your Scene
Rolling waves, splashes on rocks, or water rushing past pilings work beautifully.
Foreground elements (shells, driftwood, rocks, boats) can anchor your composition.

3. Slow the Shutter
Beginners & kids: Start at 1/4 second to 1 second shutter speed.
Hobbyists/pros: Experiment anywhere from 1/15 second up to 30 seconds with a tripod for long-exposure effects.
Lower ISO to 100 (or 50 if available) to avoid overexposure.
Use a slow-shutter app if shooting on a phone.

4. Hold Steady
Use a tripod, rock, or folded towel.
For handheld blur (more abstract), brace your arms against your body and stay as still as possible.

5. Experiment
Shorter speeds = gentle blur.
Longer speeds = silky, misty water.
Slightly move the camera during exposure for intentional artistic streaks.

6. Review & Adjust
Look at your shots and ask yourself:
“Do I want more or less blur?”
“Would a slower shutter tell the story better?”

Editing Tips

For beginners: Use Snapseed to adjust contrast, color, and sharpness.
For hobbyists/pros: Edit in Lightroom or Photoshop to fine-tune exposure, remove distractions, and enhance mood. RAW files will give you the most flexibility.

Creative Challenges

Paint with Waves: Pan the camera slowly during the shot for painterly textures.
Golden Hour Glow: Capture blurred waves during sunrise or sunset for dreamy colors.
Minimalist Mood: Focus on just water and color tones for fine-art style prints.

Life Lesson Bonus

This isn’t just about photos — motion blur teaches patience, observation, and the beauty of slowing down.

Your Turn:

Whether you’re a curious kid, a hobby photographer, or a seasoned pro, grab your camera and try wave motion blur. Share your shots with #WaveBlurChallenge — I’d love to see your creations!


Button 1 Button 2

Monday, August 11, 2025

Survival: How to Make a Durable, Waterproof Map for Your B.O.B/Go Bag


A waterproof map isn’t just for hikers — it’s a critical tool in any go bag or bug out bag. Electronics fail, GPS signals drop, batteries die, and paper maps can be destroyed by rain, sweat, or accidental dunking.

Having a physically durable, weatherproof map ensures you can still navigate when it matters most.

Step 1: Choose the Right Map

Source: Download topographic maps from the USGS, local government websites, or reliable hiking map sources.

Coverage: Include your immediate area, possible bug-out routes, water sources, alternate evacuation paths, and surrounding regions.

Scale: A 1:24,000 or 1:25,000 scale is ideal for detailed navigation.

Multiple Versions: Print more than one — one for your primary bag, one for a backup, and one for your home emergency kit.

Step 2: Print for Durability

Paper Choice: Use waterproof paper like Rite in the Rain or TerraSlate for the best results.
Ink: If printing at home, use pigment-based ink (dye-based inks can run when wet).
Color: Print in color for quick landmark recognition, but ensure it’s still readable in grayscale if the color fades.

Step 3: Waterproof the Map

If you don’t have waterproof paper, seal it manually:

Option 1: Lamination
Use a high-quality laminator with at least 5 mil thickness sheets.
Trim edges carefully and seal completely to prevent water entry.
Tip: If using thin paper, lower the heat setting to avoid bubbling or warping.

Option 2: Seal with Waterproofing Spray
Apply a product like MapSeal in thin, even coats.
Let dry completely before folding or rolling.

Option 3: Clear Packing Tape Method (Field-Ready DIY)
Lay overlapping strips of clear packing tape on both sides of the map.
Make sure seams overlap to avoid water entry.
Trim edges without cutting into the tape seal.

Step 4: Protect It in the Field

Even waterproof maps last longer with extra care:
Store in a heavy-duty zippered map case, resealable freezer bag, or military-grade Mylar map case for maximum durability.
Keep a backup in a separate compartment or dry bag.
Avoid excessive folding — instead, pre-fold along your planned route to reduce wear.

Step 5: Mark and Customize
Use permanent marker to note safe water sources, rally points, and hazard areas.
Use a fine-tip grease pencil or Staedtler Lumocolor non-permanent marker for notes that can be wiped clean later.
Highlight alternate routes in case your main path is blocked.

Step 6: Integrate Compass Skills

A map is only as good as your ability to use it:
Keep a baseplate compass in the same pouch.
Practice orienting the map with the compass before you need it.
Learn how to take and follow bearings using your map’s scale and grid.

Extra Tips for Preppers
Keep one map sealed and untouched as a backup, and one in use for marking notes.
Update your map yearly — routes, construction, and terrain can change.
Store an extra map in your vehicle emergency kit.

Extreme Temperature Caution: In very hot conditions, laminated maps may warp; in extreme cold, lamination can crack. Waterproof paper is more stable for long-term storage in harsh climates.

This setup ensures that if your phone dies, your GPS glitches, or your paper map gets drenched, you still have a reliable, readable navigation tool ready to go — because in an emergency, finding your way out can mean the difference between making it home or not.


STEM Button

Parenting: Ocean Toys by age


Toy & Kit Guide: Best Ocean Toys by Age

The ocean is full of wonder, and the right toys can bring that magic into your home. Whether your child is obsessed with sharks, mermaids, or tide pools, these ocean-themed toys and kits will inspire imaginative play and learning. Here’s a breakdown of the best options by age group.

Ages 1–3: Sensory & Simple Play

Soft Plush Sea Animals – Cuddly whales, octopuses, and sea turtles.


Ocean-Themed Stacking Cups – Great for bath time and sand play.

Chunky Wooden Ocean Puzzles – Perfect for little hands.

Silicone Bath Toys – Sea creatures that squirt or float.

Ages 4–6: Creative Exploration

Playmobil Aquarium Set – Encourages pretend play with sea creatures.


Ocean Play Dough Kits – Includes ocean molds, shells, and sensory fillers.


Magnetic Fishing Game – A fun fine-motor activity.


Aquabeads or Perler Beads Ocean Kit – Craft under-the-sea characters.


Books + Toy Bundles – Pair a plush sea creature with a matching storybook.


Ages 7–9: STEM & Imaginative Play

DIY Sea Creature Craft Kits – Build or decorate fun sea creatures.

Ocean Slime or Putty Kits – Create sparkly, blue ocean slimes.


Junior Marine Biologist books.


Shark Anatomy Models – Hands-on dissection-style kits.


LEGO Creator Sea Creatures – Buildable sharks, crabs, and squid.


Ages 10–14: Advanced Kits & Collectibles

3D Puzzle Models of Whales or Submarines


Build Your Own Aquarium Kit

Ocean Jewelry Making Kit


Ocean Wildlife Figurine Sets (Collectibles)

Where to Use Them

Morning baskets for homeschool.

Sensory play setups with water tables or bins.

STEM lessons or co-op activities.

Beach trips or backyard ocean adventures.


Image 1
Image 2

I Scream, You Scream Horror Movie Challenge Intro

I Scream, You Scream Horror Movie Challenge is a feature where every month I am challenging myself to watch every movie on one bingo card. T...